|
|
|
The Eriba Future 430T Re-build
The Eriba Future 430T Re-build
in Improving your pride and joy and how to fix things Wed Oct 04, 2017 1:21 pmby magszh (deleted)

Hello all
So we took the plunge and purchased a 2000 Eriba Future 430T at the start of the summer. The idea of getting more into camping had been growing for a while. I'd always camped as a kid, but not much as an adult. My OH had a lot more camping experience, but didn't really like the idea of risking a trip, getting washed out and having to pack up soggy gear. One of the main motivations was to have a "home" that we could use for our summer mountain biking trips, and also reduce the trip planning effort by not having to always search for apartments when we wanted to go away.
We looked at new and second-hand caravans, and settled on second-hand just because we didn't want to outlay a huge amount of cash for a hobby we weren't 100% sure about yet. What if we got a caravan then rarely used it? Dropping upwards of 15'000 CHF on a hunch just wasn't an option.
After seeing a Future 480T for sale (and missing out, fortuitously, on the auction), we got interested in this "rare" caravan. We liked the fact that it doesn't look like all the other caravans on the market, plus its compact size, low weight, and low height. We found the 430T a few days later, and snapped it up before someone else was able to. The elderly couple who were selling it were very sad to see it go!
During my research into what caravan might suit us, I'd come across caravanity.nl and a lot of Pinterest pages. Let's just say I got inspired :) I was given free reign to "design" the new interior, and there was a lot of going back and forth over how it would look. It's almost finished, and so far we're quite happy with the result!
Anyway, I will post some details and pics of the steps we've taken in this thread. I already wrote about installing the new vinyl floor here --> Adding a vinyl floor (one piece).

RE: The Eriba Future 430T Re-build
in Improving your pride and joy and how to fix things Wed Oct 04, 2017 1:38 pmby magszh (deleted)

First up, some "before" photos...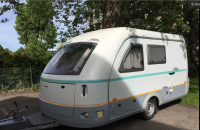
Outside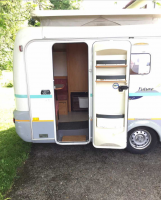
Door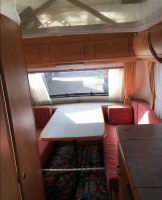
Main table / seating area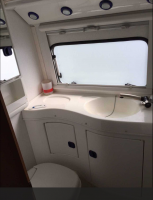
Bathroom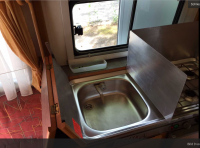
Kitchen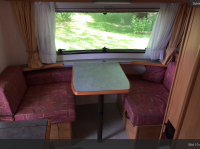
Small seating area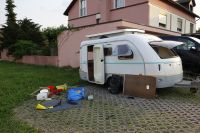
First job - emptying everything out|addpics|hib-1-2ee8.jpg-invaddpicsinvv,hib-2-2020.png-invaddpicsinvv,hib-3-3080.png-invaddpicsinvv,hib-4-36ab.png-invaddpicsinvv,hib-5-34db.png-invaddpicsinvv,hib-6-3faf.png-invaddpicsinvv,hib-7-c3ab.png-invaddpicsinvv|/addpics|

RE: The Eriba Future 430T Re-build
in Improving your pride and joy and how to fix things Thu Oct 05, 2017 12:42 pmby Randa france •
 | 13.554 Posts
Here's a gallery of them with some comments and an owner's report, Shassa :g17-The-Hymer-Eriba-Future.html
http://www.capper-online.de/html/eriba_future_caravan.htm
Randa
 ERIBAFOLK POP UP EVERYWHERE 1999 Eriba Troll 530 pushing a VW Touran 2L TDi Match

RE: The Eriba Future 430T Re-build
in Improving your pride and joy and how to fix things Thu Oct 05, 2017 2:31 pmby magszh (deleted)

So the first thing we did was empty out the entire caravan. There was a good 15 years of stuff in there...
I was pretty keen on taking out the pop-top canvas to give it a wash, patch up the damage, and reproof it. I read the threads about working with the canvas (Cleaning and re-proofing pop-top canvas), but in the end it was still way more difficult than I expected.
First I removed the lower rail (that was easy). Then I found the "bulge", and started pulling out the canvas.
A note on the "bulge" - in our caravan it was just to the left of the door, but was less of a noticeable bulge, and more like the factory guys had banged around in the rail with a screwdriver a little bit. I have no idea how they got the canvas in and out using that tiny bend in the rail.
Anyway, the canvas didn't come out. I ended up pulling down on it for ages, getting part of it out of the rail. Then the OH dragged on it to pull it out via the bulge. There was a lot of swearing.
When we finally got it off, it was pretty filthy, and had a lot of small damaged spots. I put it in a large bucket with water and wool detergent and left it to soak for a few hours.
_DSC2432.JPG - Bild entfernt (keine Rechte)
After that I rinsed it off, then put it through the machine with a gentle wash and wool detergent. I hung it in the sun to dry.
To re-proof I ordered a couple of bottles of 303 Fabric Guard, hung the canvas on a big drying rack outside in the sun, and sprayed the whole thing. It took about 1.5 bottles of 303 to cover the whole canvas. Once it was dry water beaded off perfectly.
Finally, the repairs. It had obviously had a big tear at some point, and had been repaired on one edge by the previous owners. Other than that, there were quite a few very small holes, I suspect they were caused by embers from campfires. We bought a canvas / tent repair kit and ironed little patches over all the holes. It didn't look amazing but it did the job. The main concern was preventing the little holes from getting worse.
At this point the canvas was ready to be re-installed! I'd thought about getting a new canvas made, but after re-proofing and repairing, I'm glad I didn't bother. We ended up spending enough money on other things, and it does the job...
Installation was also a pretty big pain. Firstly, given how not bulgy the bulge was, my OH decided to create a small gap in the top railing to help with the reinstall. We did this in the bathroom so it wasn't too obvious.
2017-09-12 22.13.06.jpg - Bild entfernt (keine Rechte)
Even with this, it took three adults a good 20 minutes to get the canvas back into the rail. There was a lot of swearing.
Once that was in we reinstalled the lower rails (which was relatively easy). I cleaned and re-mounted the rubber strip over the bottom rail as well. That works best with a flat-head screwdriver and NOT your finger nails. Just a hint, trust me I know!
2017-09-12 20.01.21.jpg - Bild entfernt (keine Rechte)
Finally, the canvas was back in!

RE: The Eriba Future 430T Re-build
in Improving your pride and joy and how to fix things Thu Oct 05, 2017 4:58 pmby magszh (deleted)

As you may have spotted in a photo from the previous post, we painted everything!
The first thing we did was remove as much of the furniture as possible - door shelves, table, and all cabinet doors. We also completely dismantled the front seating area, so that we could install a fixed bed (more on that in a future post). We were sure to mark all the small cabinet doors so we knew which part of the caravan they belonged to.
The original plan had been to paint everything using a 2-component paint. However, at the paint shop they assured us that the normal wall paint would be sufficient. I would half-agree. In the end we did most of the painting with a 1-component paint, and the kitchen benches and table with a 2-component paint. This was because we figured those surfaces would get a lot of wear and tear, and in this case the more robust paint would be better.
Over many, many days (or weeks...?) we painted the whole inside of the caravan, other than the fibreglass front and back.
2017-08-04 20.11.04.jpg - Bild entfernt (keine Rechte)
2017-08-20 18.35.36.jpg - Bild entfernt (keine Rechte)
2017-08-20 18.36.03.jpg - Bild entfernt (keine Rechte)
2017-09-20 20.35.33.jpg - Bild entfernt (keine Rechte)
Painting takes a long time.
For most surfaces we degreased, cleaned, sanded, then painted the surface with primer. After that 2 coats of colour. For the doors and green benches we did three coats for a bit more durability. This worked pretty well. Painting was done with little rollers and a small brush for the edges.
We also did most of the painting while the canvas was removed. This made a big difference to the air flow and our comfort while painting (no fumes building up).
For some of the furniture surfaces we didn't bother sanding, but we did notice that this paint was not as durable and had a habit of getting chipped. So if painting the furniture (cabinets etc.) definitely take the time to sand down the surface.
All the removed items were painted in the garage. This is definitely the way to go if you have the option.
Working with the 1-component paint was a lot easier than working with the 2-component paint (ie. with a hardener). Not only did you not have the hassle of mixing in the hardener, it also didn't destroy the rollers and was easier to get a nice finish.
Finally, we had a professional painter come in and silicon all the edges to tidy it up. It was only an hour's work for him, but made a huge difference to how nice everything looked!
2017-09-07 13.44.40.jpg - Bild entfernt (keine Rechte)
Without silicon
2017-09-21 18.59.06.jpg - Bild entfernt (keine Rechte)
With silicon

RE: The Eriba Future 430T Re-build
in Improving your pride and joy and how to fix things Thu Oct 05, 2017 5:04 pmby hob (deleted)

A rare beast is the Future 430 not many were made over a 2 year or so production run I personally have only ever seen one in the flesh so to speak belonging to campnsnooze one of our valued members.
I look forward to future updates ........... welcome to the forum btw 
Forum moderator
Vauxhall Insignia Sri 1.8 petrol 2015 towing 2006 Triton 430 import

RE: The Eriba Future 430T Re-build
in Improving your pride and joy and how to fix things Thu Oct 05, 2017 6:47 pmby hob (deleted)

Zitat
For some of the furniture surfaces we didn't bother sanding, but we did notice that this paint was not as durable and had a habit of getting chipped. So if painting the furniture (cabinets etc.) definitely take the time to sand down the surface.
From watching car renovations on tv new paint requires a "key" to grip onto so you are correct about sanding however a rub with a coarse grade pan scourer may do just as well 
Skimmed through this topic to start with but now read it through .............. my first van was an 89 Puck which needed a lot of work so appreciate where you are coming from also the need for ventilation when painting, we moan about the EEC but great steps forward have been made in paint make up, also agree on not using 2 pack paint if avoidable for several reasons.
Interesting idea regarding the fixed bed option ........ my 430 (Triton) is now used in semi fixed bed configuration ( IE I keep the bed made up)
May be of interest to you but the 430 Future is opposite to the 430 Triton in that the door is in a different location and the layout reversed.
Look forward to reading more
hob
Forum moderator
Vauxhall Insignia Sri 1.8 petrol 2015 towing 2006 Triton 430 import

RE: The Eriba Future 430T Re-build
in Improving your pride and joy and how to fix things Fri Oct 06, 2017 12:11 amby Shassa (deleted)

They really are a lovely van, and I can not believe that despite the fact that I spent 100s of hours on the internet researching caravans before I bought my puck, I never came across these little beauties. This is definitely going under my list of things to buy when I win the lottery. Of course buying a ticket would help...

RE: The Eriba Future 430T Re-build
in Improving your pride and joy and how to fix things Fri Oct 06, 2017 10:00 amby eribanaut •
 | 1.228 Posts
etching primer is what the trade uses it keys into the surface.
http://www.ebay.co.uk/bhp/etch-primer
http://www.mig-welding.co.uk/primer.htm
Dave
Citroen C4 auto 1.6 Hdi Troll 552 - 2005

RE: The Eriba Future 430T Re-build
in Improving your pride and joy and how to fix things Mon Oct 09, 2017 5:43 pmby magszh (deleted)

One of the things I really wanted from the beginning, was to replace the standard interior lighting with LED strip lighting. Mostly because I like the way LED strip lighting can softly light up a large area, but also to make the interior seem a bit larger by removing what I felt to be the not-that-attractive original lights.
We got a licensed electrician to do this work, as we also wanted to get the wiring / electricity for the whole caravan checked at the same time. Thanks to a small bungle, we'd drilled through an electricity cable while fixing some of the body work, and it seemed like a worthwhile investment to get that professionally fixed and everything properly checked! As the caravan had been originally purchased in France, all the plugs were standard European, and we also got him to switch these over to Swiss plugs.
The strip lighting was put over the kitchen, and behind the piece of wood that sits under the front and rear cabinets (I don't know if this has an official name?). The end result was great!
2017-09-07 13.44.37.jpg - Bild entfernt (keine Rechte)
2017-09-12 20.02.37.jpg - Bild entfernt (keine Rechte)
2017-09-12 22.10.34.jpg - Bild entfernt (keine Rechte)
The electrician also installed a three-plug connector at the electricity box (now under the bed). From there we were able to run an extension cable to behind the bathroom and add another power point ourselves.
2017-09-24 16.27.04.jpg - Bild entfernt (keine Rechte)
Finally, we took advantage of the small finger-sized holes under the centre cabinets on either end to install some small hooks. These will be used for hanging battery powered camp lamps if necessary, or more likely our little bluetooth speaker.

RE: The Eriba Future 430T Re-build
in Improving your pride and joy and how to fix things Mon Oct 09, 2017 7:39 pmby Randa france •
 | 13.554 Posts

RE: The Eriba Future 430T Re-build
in Improving your pride and joy and how to fix things Mon Oct 09, 2017 10:53 pmby magszh (deleted)

Yeah she is looking good now. When I reread what I've written it sounds like the whole process has been pretty straight forward, but it's been anything but! We've been working on it for more than three months, taking up most of our free time, and it's only now just about done! Honestly, I think it could've been a candidate for Grand Designs hehe

RE: The Eriba Future 430T Re-build
in Improving your pride and joy and how to fix things Tue Oct 10, 2017 4:42 pmby JoJo (deleted)

Well done guys! I love the colour scheme. White makes the space look so much bigger, and cleaner, than the standard Eriba beige and the turquoise is very stylish.
Does she/he have a name?
Jo
Jo & Mark, 1986 Puck called Sylvia pushing Renault Megane

 Visitors Visitors
2 Members and 107 Guests are online. |
 Board Statistics Board Statistics
The forum has 13200
topics
and
109861
posts.
|
 Forum-Chat
 2
2

 reply
reply
 | 741 Posts
